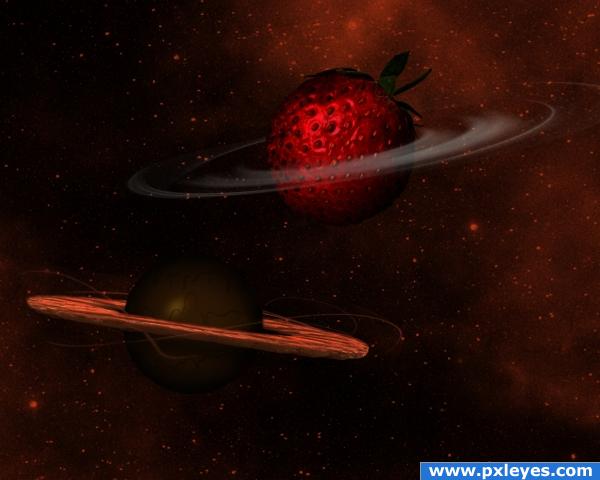
A Work in Progress: chocolate and strawberries


This guide was made for entry:
chocolate and strawberries
In Contest:
planet designs


step 1 of 7

1: start with a black background
2: add noise
3: despeckle
4: duplicate layer
5: set new layer to overlay
6: duplicate layer - set back to normal
7: change color balance
8: change layer in free transform till about 2x as big.
9: result on 50%
10: filter --> render --> clouds with a cyan kinda color
11: result at 100%
12: create new layer
13: eliptical marqueetool
14: make a circle and fill it with a brown color

Creation of chocolate and strawberries: Step 1

step 2 of 7

15: select burntool
16: choose a soft round brush 200 pxls
17: burned the edges of the brown circle
18: select dodge tool
19: used brush 45 pxls with soft edges
20: the result after burn and dodge
21: select lassotool
22: draw a shape to prepare the melting parts
23: layer style (effects) bevel and emboss
24: settings for the layerstyle bevel and emboss
25: result on 200% after apply layerstyle
26: duplicated the layer and set to invissible --> created a new layer (layer 6) and put it below the visible layer with the melting part that we beveled.(layer 5 copy)
27: select the vissible layer with the layer style (top layer/layer 5 copy) and merge down with the empty layer 6.
28: the layer style is now flattened
29: select eraser
30: brush soft round 45 pxls for the eraser
31: erase carefully the white parts on the layer with the melting effect
32: result on 200% after erasing all the white

Creation of chocolate and strawberries: Step 2

step 3 of 7

33: select the lassotool again and draw another melting part at a different place on the ball
34: I copy paste the layerstyle from the invissible layer with the other melting part onto this one
35: erased the white parts again. some places i had to paint with a 1 pxl brush over the white. I picked the color with the eyedroppertool right next to the place i wanted to paint.
36: my result on 100% after i made a few more melting parts the way i have explained.
37: I cleaned up my mess and grouped all my layers for the chocolate planet, this to keep my file a lil bit organised.

Creation of chocolate and strawberries: Step 3

step 4 of 7

38: I created a new layer. Draw a circle with elleptical marquee tool
39: filled it with some reddish color. Im not gonna use this circle actualy but just going to use it as a base shape to work with as reference, so in the end this layer will be set invissible.
40: I masked out a picture of a strawberry using quickmask (thats not as quick as it sounds like XD) and i copy pasted the strawberry on a new layer above my circle layer. set the opacity lower so i could see the circle thru. with free transform i turned it a bit and made it the size so it was almost same size as the circle.
41: select the warptool
42: with the warptool i warped it so it fit almost excactly on the red circle while try to keep ofcourse the strawberry structure intact.
43: set the opacity back to 100% and theres the beginning of my strawberry planet.
44: with the burntool and a 200 pxls soft brush i burned the edges of the strawberry
45: duplicated the strawberry layer and set it to overlay. I also grouped all the strawberry parts like i did with the choclate planet. to keep my file organised.

Creation of chocolate and strawberries: Step 4

step 5 of 7

46: I went back to the "melting" layers from the chocolate planet and started to make drips using blur, eraser and burn to redraw some of the edges or/and give more accent and shadow at some places.
47: showing more drips on the chocolate planet. All created with blur, eraser and burn tools. so NO filters used for this! I have done all the melting part layers of the choclate planet this way one at a time.
48: masked out a picture of a cookie, found on sxc.hu, with use of quickmask again like the strawberry i did before.
49: select inverse and copy
50: paste on a new layer in my planets file
51: with transform resized a bit and changed the shape so it looked more flat and with warptool i made the inside hole a bit larger so the choclate planet would fit inside
52: turned the cookie a little bit with free transform and moved it on top of the choclate planet.
53: at 100% after i erased part of the cookie so it looks like the planet is inside the cookie ring.
54: changed the brightness/contrast settings to make the cookiering a bit darker.
55: result at 100%
56: added shadow so the cookie ring would cast some shadow on the planet
57: made the planet a lil darker on the edges again with the burn tool

Creation of chocolate and strawberries: Step 5

step 6 of 7

58: used a brush from galactic brushes by axeraider - exclusive at brusheezy.com (see sources)
59: i put the brush i used in white on black to show how it looks here.
60: the brush in a new layer with a creamy white color. I selected the brush
61: and applied filter render difference clouds to it.
62: free transform
63: transformed the brush and turned it a little.
64: result at 50% after I erased some parts of the brush arround the strawberry so it looks like its a milky ring arround the strawberry.
65: the brush shown as white on black that i used to give the cookie a little more space effect. comes from the same brush set as the brush that i used to make the milky ring arround the strawberry.
66: applied the render cloud filter to the brush and blurred it a little, erased some parts and turned and reshaped it a bit with free transform.

Creation of chocolate and strawberries: Step 6

step 7 of 7

67: used a brush from the set Galaxies downloaded at brusheezy.com created by Sunira. You can see it here white on black
68: I picked a reddish color for this brush and put it on a new layer behind the planets.
69: I used free transform to enlarge the brush about 2 times as big
70: Here is the result at 50% after i erased 1 big dot from the brush that i didnt like on my bg
71: duplicated that layer and flipped it horisontal AND vertical, then moved it to the bottom left corner
72-- I know no image, i forgot to make another screenshot from the last few little edits: I removed all the shadow from the cookie ring that was not covering the planet. I didnt think the ring would cast shadow on space XD so i erased it carefully. AND i put an inside shadow on the cookie ring to make the edges a tat darker and better blend in.
AND THATS THAT.. time for tea now o.o; XD

Creation of chocolate and strawberries: Step 7

Final result

Creation of chocolate and strawberries: Final Result

LOGIN or REGISTER FOR FREE
to rate this guide and create your own guides.