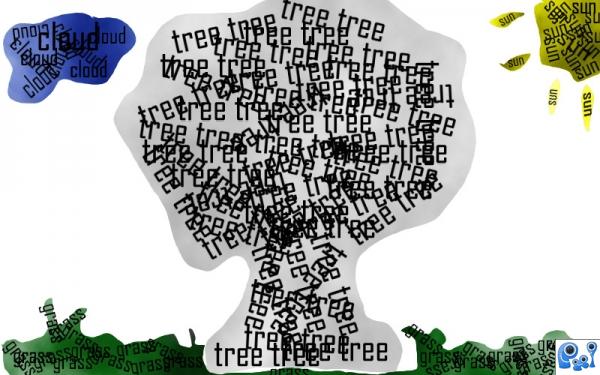
A Work in Progress: Kiddo!


This guide was made for entry:
Kiddo!
In Contest:
typography art


step 1 of 4

At first you choose a picture you would like to make a typography of, and maybe open it up into photoshop.. This might be copyrighted, but no worries, we are not gonna use it.. I chose a random tree. Then you choose the pen tool and make a line around the whole tree, and right click, choose "Fill path" or "Draw line" and start making typography inside this area. You can make the text as you want, what font you want and size.

Creation of Kiddo!: Step 1

step 2 of 4

Now you start adding the text and making some words right way and some turned.. Turn and do as you want with the text, try to fill the path as good as you can, and try to make it look like what you were going to make ;D

Creation of Kiddo!: Step 2

step 3 of 4

I added clouds in the backround of each text to make it look like the thingy I was making, so you can see it 2 :D
Go to Filter>Render>Clouds and like you see behind the tree there is no colour.. (If you want something like mine set colours to normal settings; black/white)

Creation of Kiddo!: Step 3

step 4 of 4

Now if you do this with all objects you want in the pictures it would look something like this..
But as you see i added colours to the other objects.. If you want it to look like mine, you add clouds and make a new layer, and colour it with a brush and set the layer blending option to Overlay or Hard Light. You can see what fits best 4 you ;) You could also do it by changing one of the colour setting, example yellow, from black/white to either yellow/white or black/yellow.. You can see what you think is best.. Hope you enjoy the pic.. :)

Creation of Kiddo!: Step 4

Final result

Creation of Kiddo!: Final Result

LOGIN or REGISTER FOR FREE
to rate this guide and create your own guides.