
Original image
step 1 of 11
Every good chop starts with a painful extraction.

step 2 of 11
I found an awesome cliff for our dog friend to take flight from, but it wasn't quite the right composition. I wanted it a little wider. I placed Fido on the background and then copied the background twice, sliding it over a little each time to get the composition I wanted.

step 3 of 11
I used a rectangle marquee to stretch the misty areas out and the stamp tool with a 0 hardness brush to blend it all together.

step 4 of 11
Now, we don't want the picture getting morbid. Fido is not making a jump for it, but rather taking flight. So I found some great wings for him.

- : source
step 5 of 11
I did another painful extraction. (I am a full believer in the pen tool and paths for extractions.)

step 6 of 11
...and moved them onto Fido.

step 7 of 11
I was lucky enough (or patient enough), to find a pair of wings that actually matched the dog's coloring, but not exactly, I used a hue/saturation layer to adjust the color closer to the dog's and used a little masking and smudging to blend them together at the shoulder.

step 8 of 11
I wanted to make the dog look like he was really there, so I created a solid color layer based off of the mist and put it on top with a "Soft Light" Blending mode. I didn't want it to muddy the whole picture so I selected just the dog and his wings and created a mask on the solid color layer, so that only they were affected. I also put a mask on the dog layer and revealed some of the grass around his foot. as well as used the burn tool on the grass to create a shadow.

step 9 of 11
Our friend looked a little lonely, so I gave him some birds to chase, a slightly less painful extraction.

step 10 of 11
The finishing touches get a little crazy. For me it still looks "okay". So to bump it up a notch, I do the same thing to the solid color layer with the birds, so they look there (create a mask on the solid color layer, so that the birds have the mossy grey soft light.) I also copy the background layer and add 2 curves adjustment layers, one that's a little too white, and one that's a little too black. I use a soft brush on each, pulling out lights and blacks, to make the whole image more dimensional.

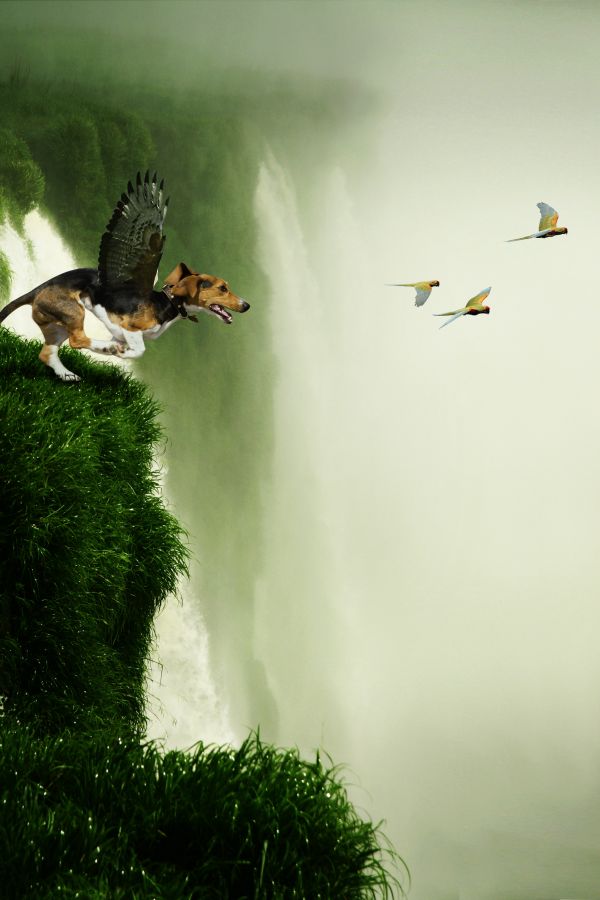
step 11 of 11
Finally I create one more copy of the background and put it on top of everything. I make the layer brighter. I use filter>distort>diffuse glow, which gives the whole layer an extra misty and slightly grainy look, and set the blend mode to "Soft Light"...and we are ready for take off!

Final result
Pxleyes
Photography and photoshop contests
We are a community of people with
a passion for photography, graphics and art in general.
Every day new photoshop
and photography contests are posted to compete in. We also have one weekly drawing contest
and one weekly 3D contest!
Participation is 100% free!
Just
register and get
started!
Good luck!
Follow us:


© 2015 Pxleyes.com. All rights reserved.