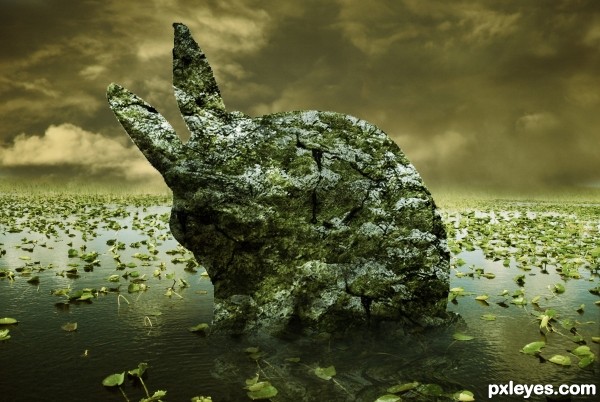
That's our main image. We have to mask it. We could so that with pen tool but Im a bit lazy, so let me show you a kinda quicker way to do it :P
step 2 of 48
I first tried the Magic Wand tool... but there's a little problem. Only part of our bunny was selected. There's a quick way to fix that.
step 3 of 48
First we should duplicate our bunny layer. To do that, simply press Ctrl + J. (or you can right click and duplicate layer.)
step 4 of 48
Then, with the duplicated layer selected, go to Image>Adjustments>Brightness/Contrast.
Set the brightness to -150 as shown in the image below. Our bunny is now darker, so it will be easier for the Magic Wand tool to select it.
step 5 of 48
1. Now, Press the "W" key or simply click on the Magic Wand tool.
2. With the wand, click on your work area.
3. Our bunny is now fully selected.
step 6 of 48
1. Now, right click on the duplicated layer, with the selection still around the rabbit, and delete it. (or simply press the Delete Key on your keyboard)
step 7 of 48
See ? The selection is now fully around our rabbit. We just need to extract it now.
step 8 of 48
That part is not necessary but I prefer doing it like that.
1. Double click on the TEXT of the duplicated layer.
2. A window will appear.
3. Erase the "Background" text and name it Rabbit.
4. Press on OK.
step 9 of 48
Our rabbit layer is now unlocked. Now let's extract it.
step 10 of 48
1. Do Ctrl + Shift + J with your keyboard.
2. The white background surrounding the rabbit will go above it in a separated layer.
step 11 of 48
1. Delete "Layer 1"
2. Our rabbit is now completely isolated on a transparent background.
step 12 of 48
1. Now, open the Mossy Rocks image.
2. Select it with the Rectangular Marquee Tool.
3. Press Ctrl + C on your keyboard to copy the image.
step 13 of 48
1. Go back to your bunny workspace and press Ctrl + V on your keyboard.
2. The rock layer appears.
3. Make sure it completely covers the rabbit before we continue.
step 14 of 48
Now we have to have the rocks take the shape of the rabbit. To do so :
1. Rename the Rock Texture Layer. (optional)
2. While holding the Ctrl key on the keyboard, left click on the little IMAGE on the left of the rabbit layer to get it selected.
step 15 of 48
1. Now, press Ctrl + Shift + J on the keyboard and delete the layer created. We now have an isolated rabbit shape made of rock.
step 16 of 48
1. Change its blending mode to "Multiply"
2. Now, go back to the original rabbit layer and press Ctrl + J to duplicate it.
step 17 of 48
1. Drag the duplicated layer above the rock texture layer.
2. Set its blending mode to "Overlay".
step 18 of 48
Our bunny seems to be covered in moss now.
step 19 of 48
Now copy the Ivy image like we did like the rocks image.
step 20 of 48
1. Paste it to the Bunny workspace and make sure it covers it like the rocks texture did.
2. Now isolate it in the bunny's shape like I showed you above.
step 21 of 48
1. Change the Ivy texture's blending mode to "Soft Light".
2. Decrease its opacity to 81%.
step 22 of 48
Our work should look like that so far.
step 23 of 48
Now we are going to add cracks to the bunny.
1. Download the Crack's brush from Brusheezy and unzip it in your desktop.
2. Go back to photoshop, choose the brush tool and click on the small triangle my arrow is pointing to.
3. A little window will appear and then click on the other little triangle my second arrow is pointing to.
4. A menu drops down and click on "Load brushes".
Now we should remove the sky to add a new one.
1. Using a big sized soft brush eraser tool at 100% opacity, gently erase the sky until you obtain something like the image below.
step 29 of 48
1. Open the sky image and copy it.
2. Then paste it in the Marsh workspace and name it "sky".
1. Now drag the "sky" layer below the "marsh" layer.
step 31 of 48
Now lets have some color adjustments.
1. With the marsh layer highlighted, press Ctrl+B on your keyboard.
2. A "Color Balance" window appears.
3. Change the settings as shown in th image below. (Red +38 and Yellow -65)
step 32 of 48
1. Ctrl + M
2. The curves window appears
3. Choose the Blue option.
4. Change its Output to 117 and its input to 143.
5. Press OK.
step 33 of 48
Now lets go back to our bunny workspace.
1. Right click on any of the layers and click on "Merge Visible".
step 34 of 48
The bunny is now in one piece.
1. Ctrl + Left Click on the layer IMAGE of the bunny to have it selected.
2. Press Ctrl + C to copy it.
step 35 of 48
Now go to our marsh workspace and :
1. Press Ctrl + V to paste the bunny.
2. Rename the layer if you want.
step 36 of 48
1. With the eraser tool with soft brush, slightly erase the bottom of the bunny.
2. You can slightly decrease opacity of the eraser for more a better effect.
step 37 of 48
1. With the burn tool, Highlights, 100% and removed the tick of the "protect tones", burn the bottom of the rabbit and also a little of the surrounding water if you want.
step 38 of 48
We have to create a reflection now.
1. Duplicate the rabbit layer.
step 39 of 48
1. Go to Edit>Transform>Flip Vertical.
step 40 of 48
1. Drag it down the rabbit.
PS : Hold the Shift key while doing that; it helps better control.
step 41 of 48
1. Now go to Filter > Distort > Wave.
step 42 of 48
A window appears.
1. Change the settings as shown in the image below.
2. Click on OK.
step 43 of 48
1. Decrease the reflection's opacity to 50 %.
step 44 of 48
Now we have to add some gradient maps. Click on "Gradient maps" as shown in the picture below.
step 45 of 48
Create 3 gradient maps with different colors.
I chose (1)Black to White
(2)Dark Orange to White
(3) Teal to White.
step 46 of 48
The 3 maps are now shown.
step 47 of 48
'We have to change the blending modes and opacities of each of them as follow :
1. Black to White - "Overlay" and 48%
2. Dark Orange to White - "Color" and 33 %
3. Teal to White - "Color" and 34%
step 48 of 48
We're done. You can add birds in the sky or you can overlay textures on the image afterwards if you wish but the main job is done. Hope you liked it :)
That was surely a LOT of hard work?
(5 years and 3369 days ago)Yes it was
I want to make a tutorial out of it later ![](http://www.pxleyes.com/forum/images/smilies/3.gif)
(5 years and 3369 days ago)I think the magic wand destroyed the shape of the bunny and made it chumpy or whatever they call it. That s why pen is ussually better.
(5 years and 3363 days ago)