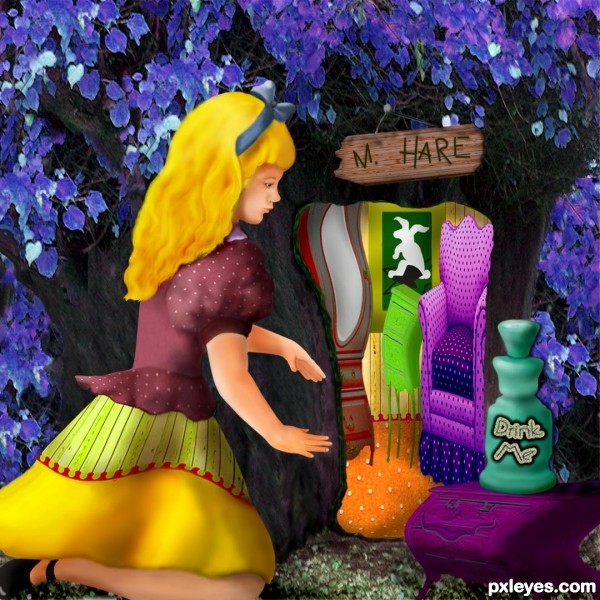
A Work in Progress: A Room in Wonderland


This guide was made for entry:
A Room in Wonderland
In Contest:
make a room


Original image


step 1 of 16

Source tree photo

Creation of A Room in Wonderland: Step 1

step 2 of 16

Chair is chopped, scaled to stretch higher, and color changed with hue/sat tool to purples. Big chest is scaled and liquify warped then duplicated. The duplicate is color changed, then the mirror cut out, then duplicate is put over original warped chest. Next the stand is also liquify warped, scaled and color changed.

Creation of A Room in Wonderland: Step 2

step 3 of 16

Tree is made into background now by erasing out the doorway in an uneven manner. An edge to show tree thickness is brushed in and shaded with burn tool. Tree will be widened later with the clone tool onto a larger canvas in order to add Alice.

Creation of A Room in Wonderland: Step 3

step 4 of 16

Wood pattern from source has been added for wall covering and the dotted pattern has been used for the floor. They will both be color changed then a little border added around the floor using a brush tool.

Creation of A Room in Wonderland: Step 4

step 5 of 16

Now the furniture is added inside the tree by layering them behind the tree. They overlap the sides of the doorway to make the room look larger.

Creation of A Room in Wonderland: Step 5

step 6 of 16

Since this will be the home of the March Hare, a rabbit and hat have been added to the frame from the source - after changing frame to green. This is then scaled down and layered behind the furniture.

Creation of A Room in Wonderland: Step 6

step 7 of 16

The wall and floor have been color changed with hue/saturation tool, and then the same is done to the tree, changing the green leaves to more unbelievable blues to fit the wonderland theme.

Creation of A Room in Wonderland: Step 7

step 8 of 16

Here I decided the room wasn't enough and needed something outside, so the tree was enlarged onto a larger canvas then clone tool to fill made tree wider and to fill in both sides with more leaves.

Creation of A Room in Wonderland: Step 8

step 9 of 16

I first thought of doing Alice standing and looking down. This I leave in to show how ideas change often as you go along.

Creation of A Room in Wonderland: Step 9

step 10 of 16

Here Alice is drawn in with brush tool in a kneeling position. This seemed to work better because she will be larger than I could have made her standing.

Creation of A Room in Wonderland: Step 10

step 11 of 16

Another table is made from source table and changed to purple. This has short legs for in the foreground. A bottle is shaped with brush tool and has had blue brushed over it ready to trim, size and shape. Later it will be made even larger to read better by the viewer. With text tool, 'Drink Me' is added using Zelda 30 point lettering.

Creation of A Room in Wonderland: Step 11

step 12 of 16

Here I've decided to finish the girl in the kneeling position and have worked on her face and hair, mostly using airbrush tools, and have used dotted pattern from room wall for her dress top and sleeve.

Creation of A Room in Wonderland: Step 12

step 13 of 16

Bottom of dress is now added using the wall and floor merged pattern from the room. Some liquify warping will be used to shape it.

Creation of A Room in Wonderland: Step 13

step 14 of 16

Girl is almost finished, having added a leg and shoe, and work on her arms and hands. Bottle has been enlarged.

Creation of A Room in Wonderland: Step 14

step 15 of 16

Finally, a sign is added over the door using a small piece of the board pattern in source and using brush tools for text, nail and rope to hang it.

Creation of A Room in Wonderland: Step 15

step 16 of 16

Final step is to make refinements to Alice where needed, then lower size to upload.

Creation of A Room in Wonderland: Step 16

Final result

Creation of A Room in Wonderland: Final Result

LOGIN or REGISTER FOR FREE
to rate this guide and create your own guides.