
Original image
step 1 of 21
First I drew the first draft, using the mouse

step 2 of 21
I cut out the images with the trunk of the tree and the image with the head of the tree, I used the selection tools. In the trunk I used the technique for warping Warp he did the same thing with the leaves and then put in blending DARK

step 3 of 21
I used the source of the clouds as background

step 4 of 21
In another source I cut some parts and I was doubling them in lighting until you get the result I wanted.

step 5 of 21
Blur the background, and pasted the cloud already in position.

step 6 of 21
In the image of the house, cut only the home and placed in position, with the field I used the ellipse selection tool and cut out just the piece needed to stay right in the middle of the cloud. To make the cloud invading the grass I created a mask and used the brushes with PS Scatering

step 7 of 21
Set the tree in a better position, I used free transform

step 8 of 21
I adjusted the sheets again, and I used random brush underneath the cloud and then applied blur

step 9 of 21
Inside the house, look who has a small window, where a person is looking out, cut it to see the bottom. Using the selection tools

step 10 of 21
In the image of another house that is part of the floor, I cut it alone and paste in the project.

step 11 of 21
Bend it with the transform tool WARP

step 12 of 21
In the image of the chains, that I liked to cut out and pasted over the project

step 13 of 21
Positioned where the current pleased me more, cutting out the chairs using the selection tool COLOR SELECTON and inverted colors

step 14 of 21
In the trunk of the tree I used the tool to darken BURN (O), made a selection and was dark until he found he was good.

step 15 of 21
Trimmed leaves of the tree a little more, I thought they were still with little realism, I used masks and brushes with Scatering

step 16 of 21
I got a bit of the frame, and started working with the lights and shadows, created layers and painted them black and white and then put in blending OVERLAY

step 17 of 21
I kept working the lights and shadows, but now I used the Burn and Dodge tools

step 18 of 21
In the image of the birds did not need nor cut, simply pasted it in the project and put the blending MULTIPLY

step 19 of 21
I created the rings of reference using the selection tool and then put the edge blend options

step 20 of 21
I cut out of the cloud under the house, I applied this result feather "Smoke Rings"

step 21 of 21
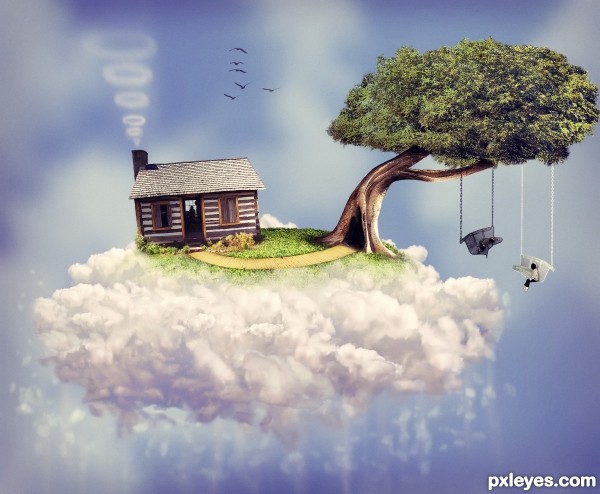
I clipped the image of the child, turned off her face with the Burn tool, turned her foot down with the Warp, and tried to get the colors in the result that pleased me most

Final result
Pxleyes
Photography and photoshop contests
We are a community of people with
a passion for photography, graphics and art in general.
Every day new photoshop
and photography contests are posted to compete in. We also have one weekly drawing contest
and one weekly 3D contest!
Participation is 100% free!
Just
register and get
started!
Good luck!
Follow us:


© 2015 Pxleyes.com. All rights reserved.