
Original image
step 1 of 6
I wasn't sure where I was going to go with this, so I decided I would just play with it by rebuilding the pencils. If nothing else, it would be good practice. I started with the brown pencil, since it was the largest, and distorted it into shape. I took parts of the other pencils, blended with the clone tool, adjusted the brightness and merged.

step 2 of 6
I was still just playing at this point, so I took the tips of the pencils and, using warp and distort, fit them to the ends of the wooden pencils. I decided I didn't like the raw pencils, so I painted them by using the sample color tool on the tip and, on a separate layer, painted the color over the wood. I used the magic wand on the wood layer, creating the "marching ants", then back to the paint layer and Edit > Clear. A perfect fit over the wooden part.
I used a Brightness/Contrast adjustment layer for the shadow and the pen tool > stroke with a lighter color and blur for the high light.
I used a Brightness/Contrast adjustment layer for the shadow and the pen tool > stroke with a lighter color and blur for the high light.

step 3 of 6
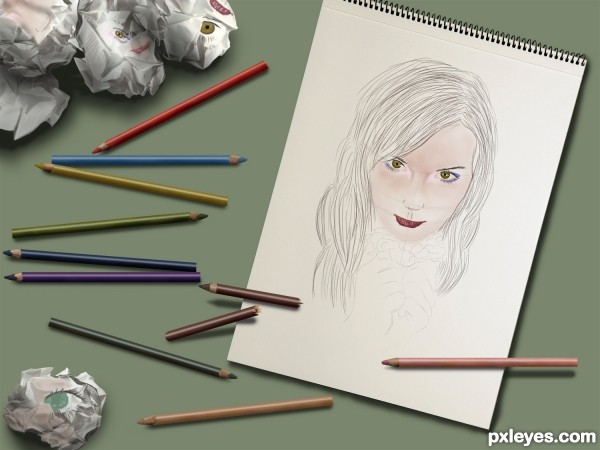
Finally, inspiration. If you have colored pencils, you're going to draw something. So you need a drawing pad. And, if you're drawing, you're not always going to get it right the first time. Added the wads of paper. I made the wads of paper look different by using warp, distort, turning some and layering others. I also used Image > Match Color, matching the color of the wads to the pad.

step 4 of 6
Now, what to draw. In my imagination, the artist saw a pretty girl when he was riding the bus and, when he got home, started to draw her from memory. I am not that artist. I placed the photo over the drawing pad and reduced the opacity. On another layer, I drew the classic proportions guide. Taking colors from the pencils, I drew in her eyes, hair, mouth and skin.

step 5 of 6
I merged all the drawn parts onto the pad, scattered the pencils (breaking one in the process) and painted in the shadows.

step 6 of 6
Some of his unsuccessful attempts would be showing, so I took parts of my drawing and warped, smudged and erased them to fit on the paper. I also used a Brightness/Contrast adjustment layer to add shadowing on the paper wads.

Final result
Pxleyes
Photography and photoshop contests
We are a community of people with
a passion for photography, graphics and art in general.
Every day new photoshop
and photography contests are posted to compete in. We also have one weekly drawing contest
and one weekly 3D contest!
Participation is 100% free!
Just
register and get
started!
Good luck!
Follow us:


© 2015 Pxleyes.com. All rights reserved.